Your position:HOME > PRODUCTS > Ultrasonic Detectors >
SW7 Ultrasonic Thickness Gauge
Model:
SW7
Description:
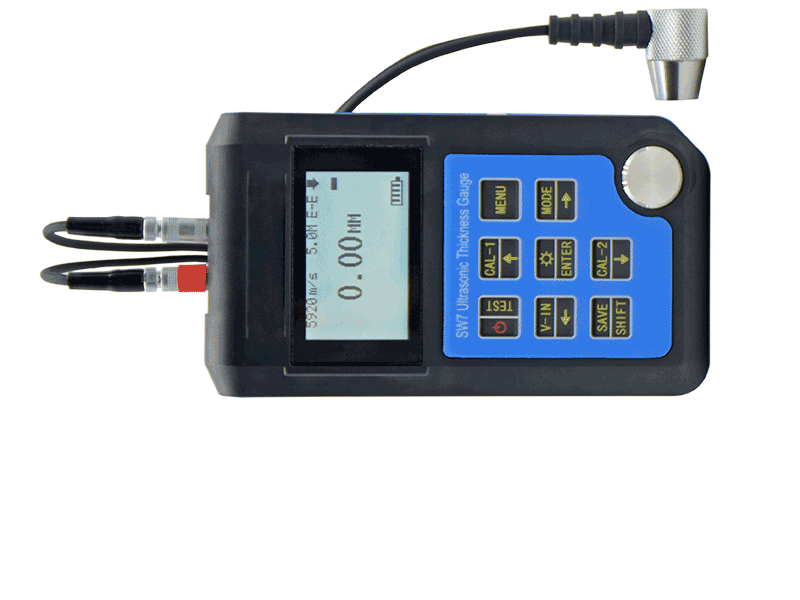
SW7 is a high-precision ultrasonic thickness gauge independently developed by Qingcheng Ltd., which is suitable for various materials through-coating high-precision measurement needs.
Features:
Penetrable coating, high measurement accuracy, large detection range, large data storage space.
ENQUIRY NOWORDER NOWCONTACT:+86-20-32290092
SW7 Portable Ultrasonic Thickness Gauge / E-E (Echo-Echo) Through Paint & Coatings
Description
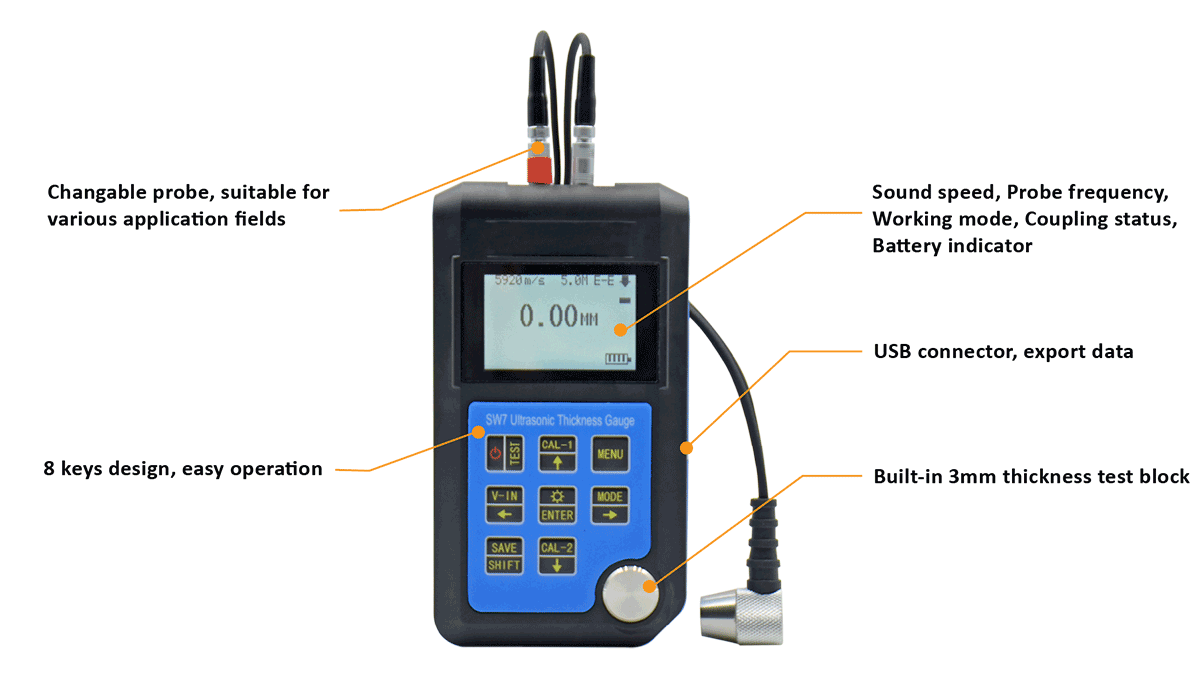
SW7 is a high-precision ultrasonic thickness gauge independently developed by Qingcheng Ltd., which is suitable for various materials through-coating high-precision measurement needs.The thickness of the workpiece can be measured quickly and accurately only by placing the probe on the contact surface on one side of the workpiece. And it is convenient to measure the workpiece coated with paint or anticorrosive material.

SW7 Ultrasonic Thickness Gauge (Through paint & coatings)
- Backlight
- Data storage
- Alarm measuring
- Auto off
- Battery indicator
- Coupling indicator
Various materials
It can measure the thickness of steel, cast iron, aluminum, copper, zinc, quartz, glass, polyethylene, PVC, gray cast iron, ductile cast iron and other materials.
Various shapes
It can measure one side of pipes, tanks, tubing, containers, hollow castings, huge metal or plastic sheets, and other test pieces with an internal surface that is impossible or difficult to reach.
Various sound speeds
9 common sound speeds are built in and the sound speed could be edited by customer.
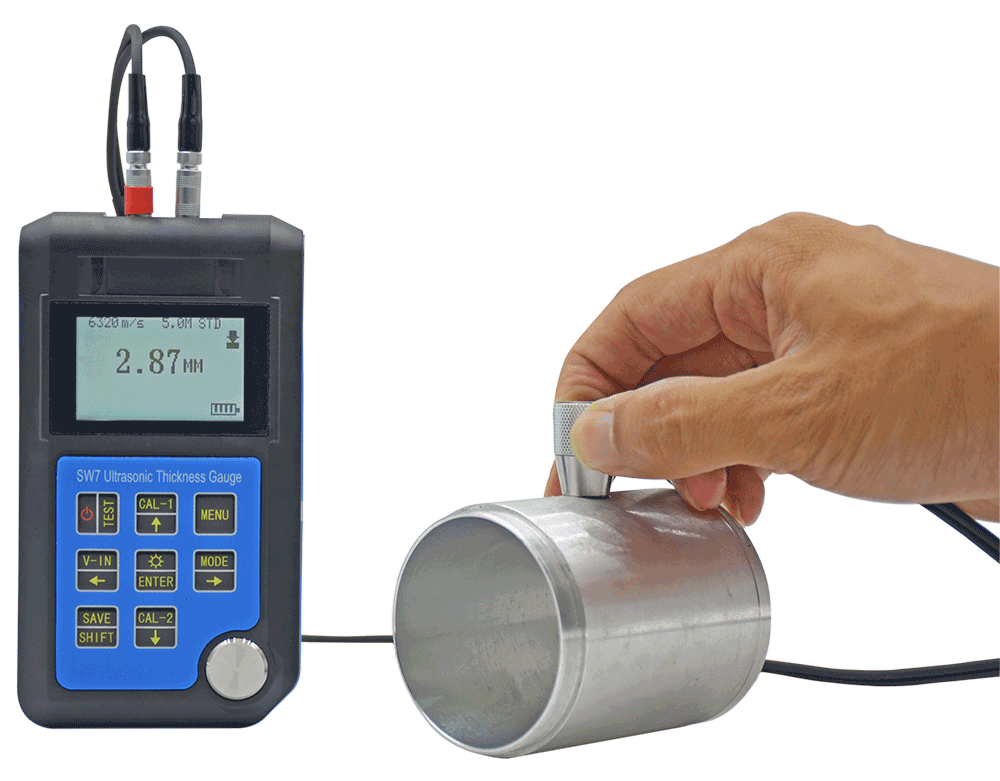
8 Working Modes
- Standard
- Scan
- Alarm
- Average
- Difference
- High Temperature
- Dim
- ECHO-ECHO
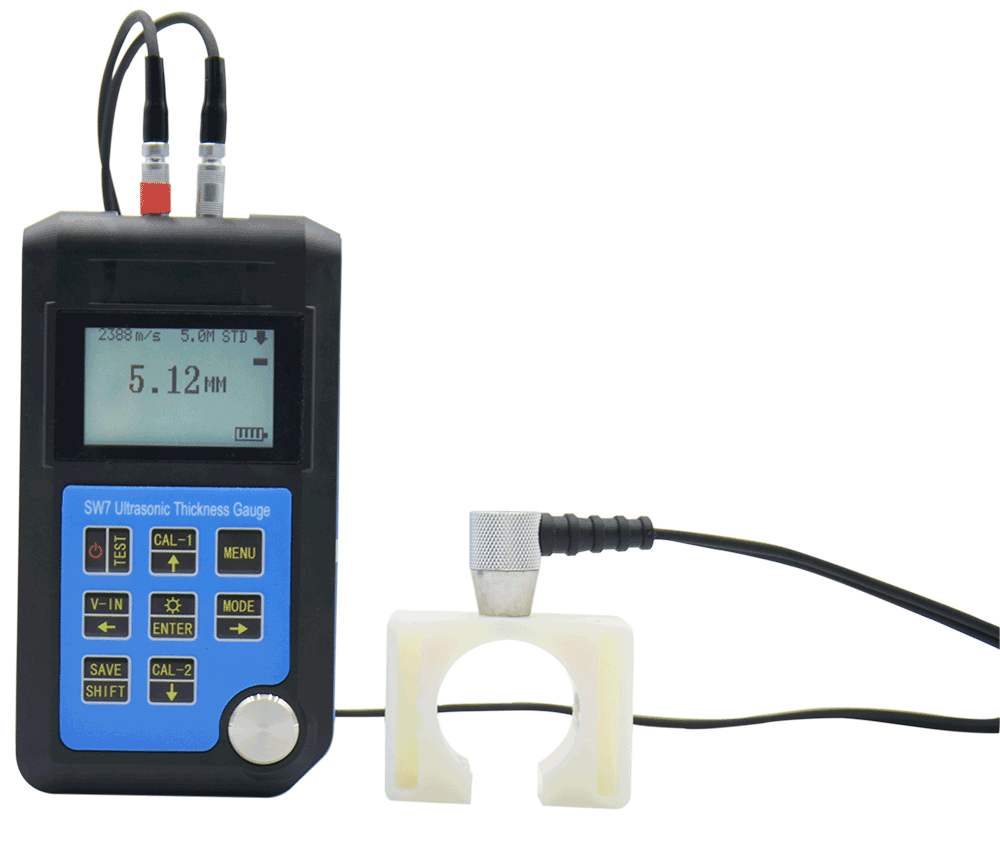
Through paint & coatings
3mm-50mm
High Precision
0.01mm / 0.001inch
Wide-range
0.65-500mm
Large Storage
2000 sets of data
Low power consumption
Long working time
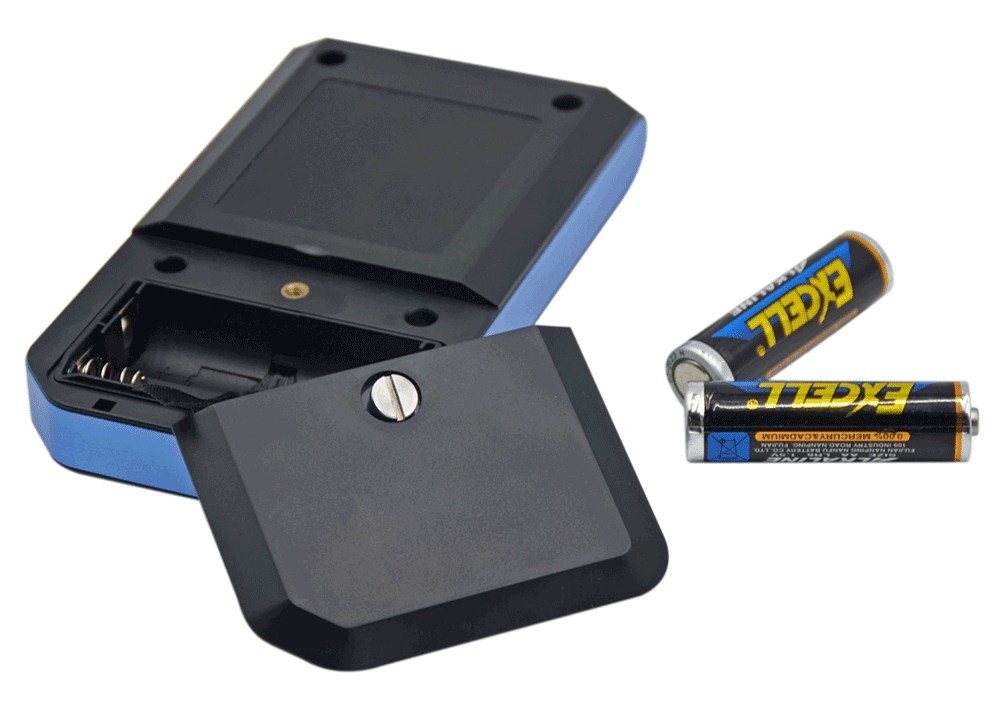
- 2 AA batteries 3VDC
- 280 hours working time (Backlight off)
- 100 hours working time(Backlight on)
Standard configuration
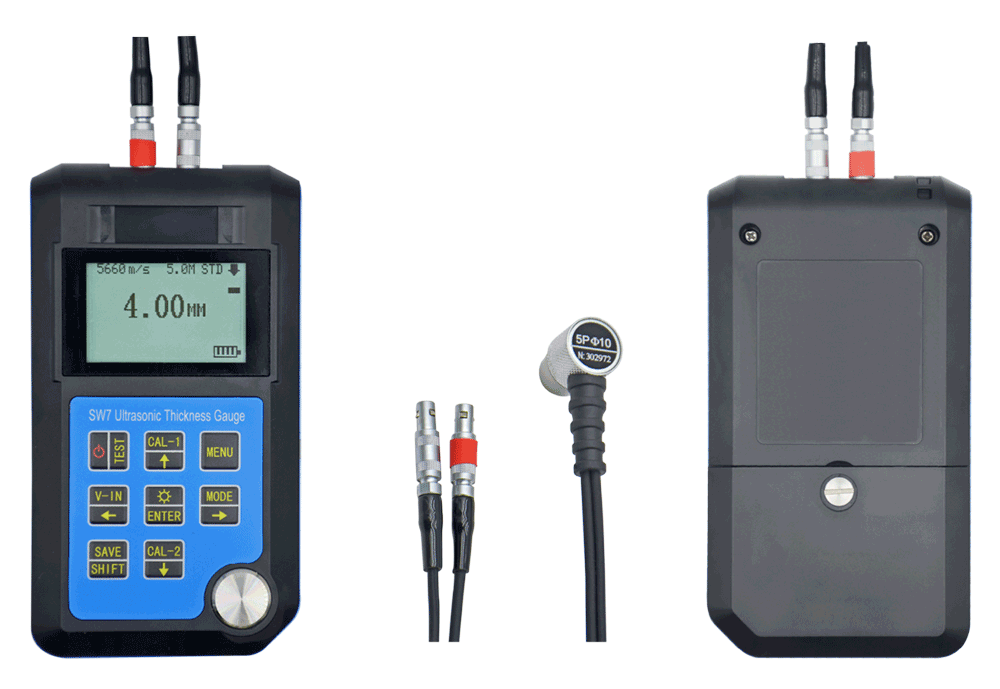
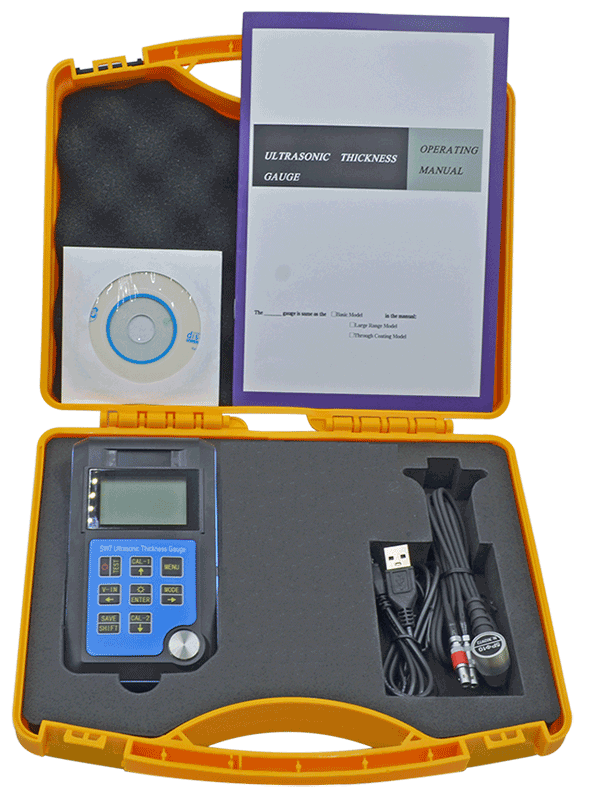
- SW7 thickness gauge
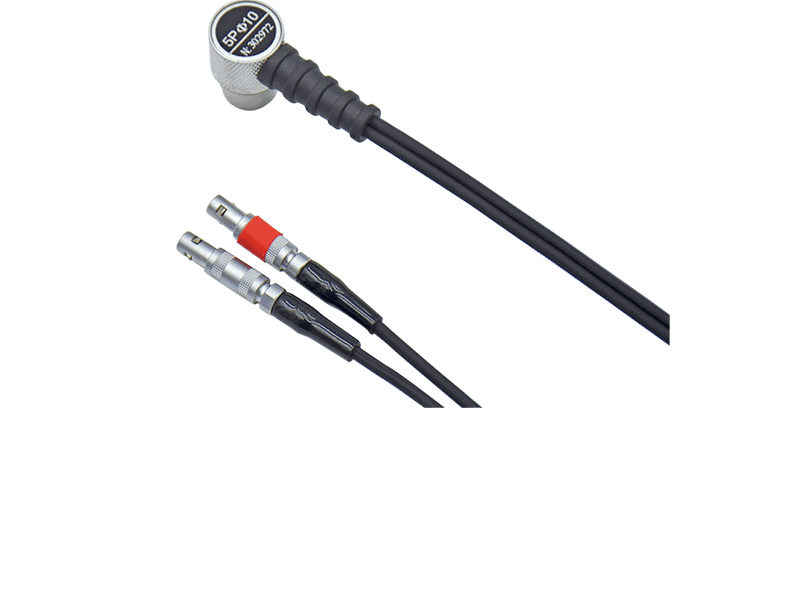
- Probe 5MHz, Φ10mm (Selectable)
- User handbook
- USB cable
- Software CD
NOTE: Due to shipping issues, we do not supply batteries and coupling agent.
Main Features:
- SW7 can be used to measure thickness through the coating (0.1-3mm) on the workpiece surface, it is suitable for thickness measurement of almost all materials, such as metal, glass, plastic, rubber, and other materials.
- Probe self-adaptive functions: automatic matching different manufacturers of various types of probes, including identifying the sensitivity and frequency of probe, automatic adjusting the thickness gauge parameter Settings, to reach the best measuring effect.
- Power-on self-check function, which help to improve the measurement accuracy.
- Probe zero automatic calibration, sound velocity calibration function.
- USB data transmission interface, easy implementation and computer data connected to export data (data format. TXT).
- Metric/inch optional: display unit can choose between mm and inch.
Thickness measuring range:
- 0.65~500mm (Steel)
- 0.65~200mm (Glass)
- 3~50mm (Cast iron)
- 4~80mm (High temperature)
- 3mm~50mm (Echo-Echo mode)
Note: The thickness measurement range for different materials depends on the performance of the probe as well as the material surface condition and the ambient temperature measured.
Technical Specifications:
| Sound velocity | 509~18699m/s, settable |
| Measurement accuracy | ±(0.5%H+0.05) mm (H means the thickness of the testing workpiece) |
| Display precision | 0.01mm or 0.001inch |
| Receive bandwidth | 1MHz~10MHz(-3dB) |
| Lower limit of steel pipe measurement: (Probe: 5MHz, Φ10mm) | The diameter should be at least 15mm, thickness should be more than 2mm |
| Measurement frequency | 2 ~ 20 times/s, settable |
| Power source | 3V DC (two AA alkaline batteries) |
| Screen display | 128×64 dot matrix LCD |
| Working hours | 280 hours (Backlight off); 100 hours (Backlight on) |
| Applicable temperature | -10℃ ~ 50℃ (Ambient temperature); -10℃ ~ 300℃ (High temperature) |
| Operating humidity | 20% ~ 90%RH |
| Dimension | 136(L) mm×72(W) mm×20(H)mm |
| Weight | 176g (including battery) |
| Built-in test block thickness | 3mm |
Optional probe:
| Probe type | Specification | Measuring range | Probe Diameter | Frequency | Temperature |
| Standard type (suitable for coating workpiece) | 5M,D10 |
0.8~300mm 3.0~50mm (coating) |
10mm | 5MHz | -10~+50℃ |
| Small-diameter type | 5M,D6 | 0.70~60mm | 6mm | 5MHz | -10~+50℃ |
| Standard type | 2.5M,D12 | 3.0~500mm | 12mm | 2.5MHz | -10~+50℃ |
| Micro-diameter type | 7.5M,D6 | 0.65~25mm | 6mm | 7.5MHz | -10~+50℃ |
| High precision type | 7.5M,D10 | 0.65~250mm | 10mm | 7.5MHz | -10~+50℃ |
| High temperature type | ZW5P | 4.0~80mm | 12mm | 5MHz | -10~+300℃ |
| Special cast iron type | 2M,D22 | 3.0~50mm(cast iron) | 22mm | 2MHz | -10~+50℃ |
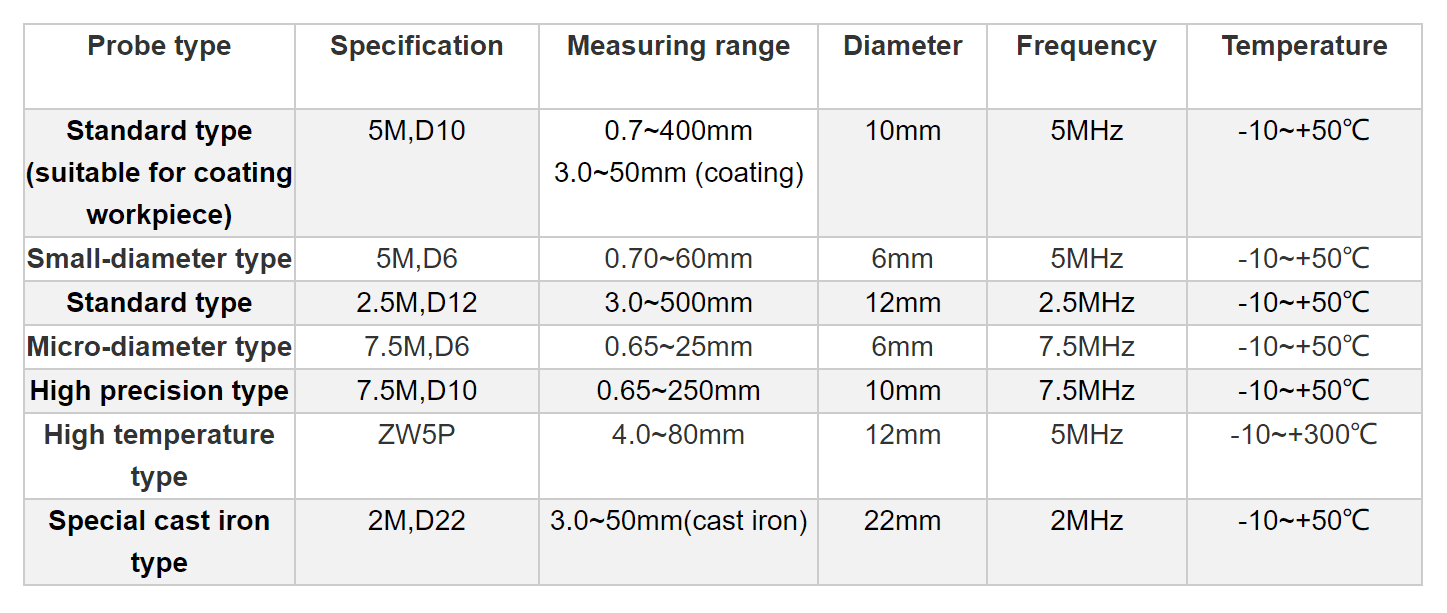
Note: To make sure the probe working properly it needs to use couplant to isolate the air between the probe surface and the measured workpiece surface.
Measuring Principle:
The principle of the ultrasonic thickness gauge is to generate ultrasonic pulses through the probe. The pulse enters the workpiece from the contact surface of the probe and the workpiece, propagates in the workpiece along the thickness direction, and reflects on the other surface of the workpiece. By measuring the total time (t) of the ultrasonic pulse propagating in the workpiece and the velocity (v) of the ultrasonic pulse, we can obtain the relationship between the thickness (H) of the workpiece with the time (t) and velocity (v):
H =vt/2
Where:
H - Thickness of the test workpiece.
v - Sound Velocity in the workpiece.
t - The measured round-trip transit time
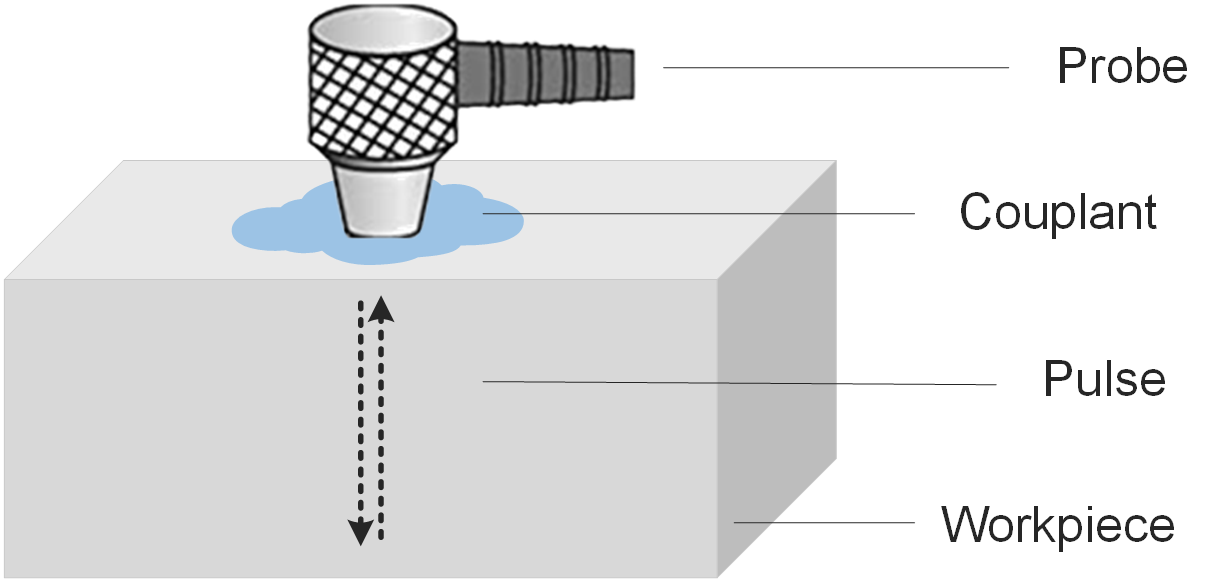
Note: To make sure the probe working properly it needs to use couplant to isolate the air between the probe surface and the measured workpiece surface.
Demonstration Video
Video #1 | Watch now
Applicable condition
- The surface of the measured workpiece should be clean. If it is rough or seriously corroded, coupling agent should be used on the surface, or treat the surface of the measured workpiece with rust remover, wire brush or sandpaper.
- If the workpiece surface is coated with paint or anticorrosive materials, it can be measured directly without treatment.
- Ensure that the surrounding environment has no strong vibration, no strong magnetic field, no corrosive media, and serious dust.
- The probe should be selected according to the thickness and shape of the measured workpiece.
- When measuring at ambient temperature, the surface of the measured object should not exceed 50°C, otherwise it will damage the probe. If the probe is worn, the measurement value will be unstable. At this time, the probe should be replaced.


